- A+
Canon Printer Reset Guide: Clearing Your Printer in Simple Steps
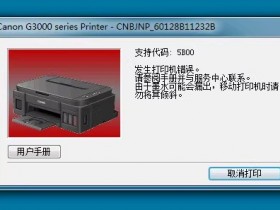
If you own a Canon printer, you might have encountered issues such as error messages, ink cartridges running out too soon, and other problems. In most cases, resetting your printer can help solve these issues, but the process can be confusing for those who are not familiar with the technology. Here is a step-by-step guide on how to reset your Canon printer quickly and easily.
Step 1: Turn off your printer
The first step is to turn your printer off completely. You can do this either by pressing the power button or unplugging it from the power source. Wait for a few seconds, then proceed to the next step.
Step 2: Press and hold the Resume/Cancel button
Locate the Resume/Cancel button on your printer. Press and hold it down for 10-15 seconds. You will notice that the LED lights start to blink. Keep on holding down the button until the lights stop blinking.
Step 3: Release the button
After the LED lights stop blinking, release the Resume/Cancel button. Your printer should be in its default mode now. If the lights are still blinking, repeat the process until they stop.
Step 4: Run a test print
Turn your printer on and run a test print to see if the issue has been resolved. If not, repeat the process again or seek professional help.
Conclusion
Resetting your Canon printer can be a quick and easy solution to many printer problems. However, if the issue persists, it could be a sign of a more significant problem. It is advisable to seek professional help in such cases to avoid further damage to your printer.